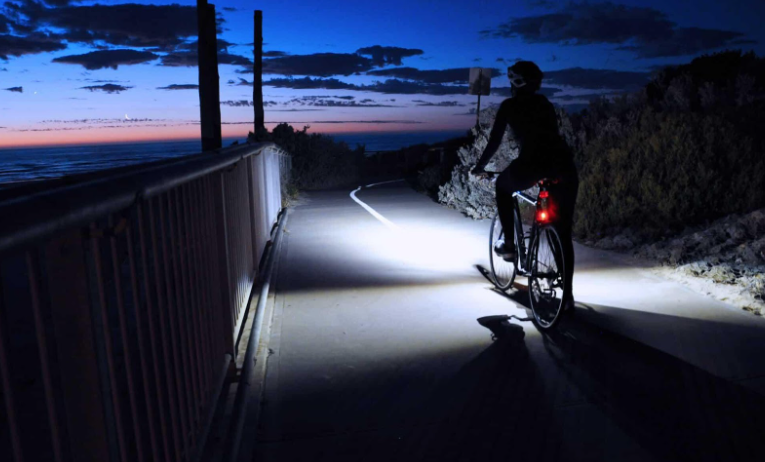
Want to learn the basics of bike lighting for commuting? This article is for you.
Now let’s talk about BASIC LIG bikes!
In this article, we’ll cover the basics of bike lighting so you can determine which bike light best suits you and your needs. There are some basic assumptions we cover when we talk about commuter bike lights:
Do you want to be seen with your lights on or is it just for safety?
How dark does it get?
How fast will you drive?
How long should the light last?
The most important question to ask yourself is, do you want to be seen or be seen with this bicycle light?
This is probably the most important question to answer and will help you determine what type of commuter bike lights to look for.
Do you need light to see?
This is usually because you drive during the day and you just want something that simulates driving during the day or at night, has a streetlight that gives you enough light to see.
To make it easy for yourself, ask yourself how dark it is and how fast you will be driving.
Why is speed important? Because if you go fast, you have to be able to see under the pavement. This gives you time to overtake if there is a pothole or you slow down.
Power and running time for light bikes
In terms of battery and power, you have 4 power sources for the bicycle lamp, so you have different light and working times: standard battery, rechargeable battery, dynamo lights and electric bicycle lights.
Basic batteries for bicycle lights
- Standard batteries such as AA and button batteries. These lights won’t be as bright as other options, but they are reliable because they can be plugged in or cooled for months at a time. They are also very affordable and are a great option for anyone just starting out or has a pocket lighting kit. These lamps range from $10 to $60 or more per set. Note the warning not to place button battery lights near small children as button batteries can be fatal if swallowed.
- Rechargeable Batteries – These batteries are placed inside or outside the battery so that they can be replaced. These are now some of the brightest lighting options available, with an optimal run time of over 3 hours for bright headlights and natural light after hours. These lights range from about $30-$40 for something reliable to hundreds and hundreds of dollars for super bright lighting for racing situations. The downside is that they lose their charge quickly in cold weather and you have to charge them when you need them because they are usually uncharged and cold. You leave it installed as the selected battery.
- Dynamo Lights – The bottom line is that you get a new front wheel with a center hub that distributes power in corners. Then the power goes to the lamp and it has other functions such as turning on the backlight and you can charge it via a USB charger. This ensures that you have light power during use, no battery needed! Complete alternator systems start at about $300 for new wheels and headlights.
- E-Bike Lights – Most e-bikes now come with a bike light that is powered by your e-bike’s main battery, making them reliable. When using the e-bike, open the rail door and the flashlight is available for use. These lights are usually installed on your bike when you buy them, but adding them later is possible and can cost around $100-$300 with a few mechanics who know how to install them. These lamps are usually suitable for city bikes.
Bicycle light Basic conclusion
It usually takes into account whether or not you should show, how dark it is, how fast you’re driving, and how long it takes to charge the battery. Also consider some options such as a lamp on your helmet, a lamp around the city rails or a bicycle lamp to add some fun!
Finally, don’t be cheap. Use a quality product that you can buy from a good retailer with a high quality battery and designed to give you long lasting light.